GREATPLANES Rapture 40 Manual
Contents
1. 16 Cut or drill the hole where necessary for the needle valve and trim the fuselage side for the muffler A rotary tool with a carbide cutter works best Build the Front Turtledeck 3 1 Glue on the front turtledeck formers FD1 FD2 and FD3 Use a small builder s square to make sure the formers are vertical J 2 Cut seven stringers for the front of the turtledeck from two 1 8 x 1 4 x 36 3 2 x 6 4 x 910mm balsa sticks Glue the stringers into the notches in the stringers Sand the ends of the stringers even with formers FD1 and FD3 FRONT TURTLEDECK SHEET 1 2 SHEET i 6 94 ___ lt lt FRONT BACK 2 1 8 dimensions shown in the sketch from a 3 32 x 3 x 24 2 4 x 75 x 610mm balsa sheet Wet the outside of the sheet with a few sprays of window cleaner then gradually soften the sheet by bending it as shown gt 2 7 4 Test fit and bend the sheet into position Trim the sheet as necessary so the top edge ends in the middle of the top middle stringer After the sheet has been cut to the correct size glue only the bottom edge to the fuselage 25 J 5 Apply medium or thick CA to the stringers and formers then bend the sheet down into position Hold tightly for a few seconds until the CA has hardened enough to hold on its own i 2 J 6 Cut wet bend then glue the other half of the turtledeck sheeting into position Sand2. bn fr P ade d LJ 1 Cut both 3 16 4 8mm gray plastic pushrod guide tubes to a length of 18 1 2 470mm Use coarse sandpaper to sand the guide tubes so glue will adhere Insert the tubes through the holes in the fuselage formers as shown on the plan Note that the tubes cross between formers F4 and F5 7 2 Mix a small batch of 30 minute epoxy and microballoons Use the mixture to glue the guide tubes in the exit slots in the back of the fuselage Be sure to build up a small fillet around both guide tubes on the inside and outside of the fuselage Allow the epoxy to fully harden J 3 Use medium CA to glue the guide tubes to the rest of the formers After the epoxy from the previous step has hardened use coarse sandpaper to sand the guide tubes even with the fuselage sides 5 J 4 Cut the servo rails from the 1 4 x 3 8 x 9 6 4 x 9 5 x 230mm basswood stick to fit in the slots in the fuselage sides Install the rails but glue only the front rail into position 1 5 Temporarily install two or three servos on the rails Using the servos to set the correct spacing glue the aft rail into position Be sure to leave a small space between the servos and the rails so the servos can be removed After the glue hardens remove the servos 23 J 6 Assemble the fuel tank not included according to the instructions that came with it Mount the fuel tank to the tank tray TT with a 64 r
3. my Bl uN R3 BE aaa 1 RB E se FOP 2 55 R3 R3 83 1 R3 R LBS 3 R3 83 po valli se i GEA aise mE ue R3 Lu i ATA ap E i AA EET BALSA GAPPED AILERON A ENEE ia lo Te BALSA SHAPPED AILERON esas SMS oo a o apo o o 12 ea aae aa i EL Ey Hin fone gageo IZA ZT meron 485 32 AAA gt gt IiE roo ORUE UT Es QUE gt 7 ere eS A
4. P oys wee ho 70 ADUSTABLE ii a 559297 sas 1 o 2 pys HES 26 67 3 pey me APT Fuge BOTTOM Nos Logg Fasten F 5 Nos RAMASE 1 F 4 a er FUSELAGE LEFT SIDE VIEW 1 0 y 60 PELO Pr 8 Ft ai 55 REMOVED FOR CLARITY 1 gt 1 ma ELO co ae sro sie syg pasa 20 E aA agin 174 20 Non ws 87 EN S CROSS SECTION AT E J9 FORMER F 1 CROSS SECTION AT BALSA SHAPED FORMER F 2 ELE BLING SURFACE BALSA SHAPED LEADING EDGE DATES DE CUT 3 PLY Bal fine it DOWEL PLATE WD BALSA SHAPED MEN BAA f lt 5 TT Ma fe 1 LEFT WING PANEL cos ao R A Raa RIGHT WING PANEL ma BENE
5. 19 0 mm 24 609 6 mm 1 8 3 2 mm 1 25 4 30 762 0 mm 5 32 4 0 mm 2 50 8 36 914 4 3 16 4 8 mm 3 76 2 1 4 6 4 mm 6 152 4 Inch Scale 0 1 u 3 4 5 6 7 0 10 20 30 40 50 60 70 80 90 100 110 120 130 140 150 160 170 180 Metric Scale DIE CUT PATTERNS 1 8 X 5 1 8 X 47 LIGHT PLY QNTY 2 SS IW XX SNS OOO RAP4F01 1 8 X 4 5 8 X 36 LIGHT PLY QNTY 1 x SS V X NN AAN YII POSO A 1 16 X 3 X 12 BALSA QNTY 1 3 32 X 3 X 24 BALSA QNTY 6 SS SS OS 3 ZV oie dy 3 32 X 3 X 24 BALSA QNTY 2 3 32 X 3 X 24 BALSA QNTY 2 KAYE SASS lt XX y N N BRA Ces SE NNNN ss sas 5 1 8 23 3 LIGHT PLY QNTY 1 4 5 8 X_23 3 4 LIGHT PLY QNTY 1 al FA AN AeA N i N HAS RO XESS SSS SE AS Y SAS SSS SN RAP4F04 5 1 8 X_23 3 4 LIGHT PLY QNTY 1 5 1 8 X_23 3 4 LIGHT PLY QNTY 2 ive DY NRO 2 1 9 OO RSS RAP4F05 BUILD THE TAIL SURFACES Build the Fin amp Rudder J 1 Unroll the full size plan sheet and reroll it inside out to help it lay flat Cut the fin plan from the rest of the plan or position the plan so the fin is over your building board Cover the fin plan with Great Planes Plan Protector or wax paper so glue will not adhere to
6. One final note about flying your model Have a goal or flight plan in mind for every flight This can be learning a new maneuver s improving a maneuver s you already know or learning how the model behaves in certain conditions such as on high or low rates This is not necessarily to improve your skills though it is never a bad idea but more importantly so you do not surprise yourself by impulsively attempting a maneuver and suddenly finding that you ve run out of time altitude or airspeed Every maneuver should be deliberate not impulsive For example if you re going to do a loop check your altitude mind the wind direction anticipating rudder corrections that will be required to maintain heading remember to throttle back at the top and make certain you are on the desired rates high low rates A flight plan greatly reduces the chances of crashing your model just because of poor planning and impulsive moves Remember to think Have a ball But always stay in control and fly in a safe manner GOOD LUCK AND GREAT FLYING Make a copy of the identification tag shown below and place it on or inside the model This model belongs to Name Address City State Zip Phone number AMA number OTHER ITEMS AVAILABLE FROM GREAT PLANES Great Planes Ultra Sport 40 Plus Kit If you ve progressed past trainers and want an easy to fly sport model with a wide performance range the 58 5 span Ultra Sport 40
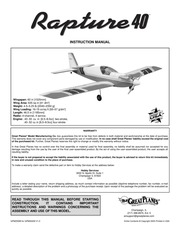
7. apalacre 1 INSTRUCTION MANUAL Wingspan 60 in 1525mm Wing Area 635 sq in 41 dm Weight 4 5 5 25 Ib 2040 2350 g Wing Loading 16 19 02 sq ft 50 57 g dm Aje Length 46 5 in 1185mm Radio 4 channel 4 servos Engine 40 50 cu in 6 5 8 0cc two stroke 40 52 cu in 6 5 8 5cc four stroke WARRANTY Great Planes Model Manufacturing Co box guarantees this kit to be free from defects in both material and workmanship at the date of purchase This warranty does not cover any component parts damaged by use or modification In no case shall Great Planes liability exceed the original cost of the purchased kit Further Great Planes reserves the right to change or modify this warranty without notice In that Great Planes has no control over the final assembly or material used for final assembly no liability shall be assumed nor accepted for any damage resulting from the use by the user of the final user assembled product By the act of using the user assembled product the user accepts all resulting liability If the buyer is not prepared to accept the liability associated with the use of this product the buyer is advised to return this kit immediately in new and unused condition to the place of purchase To make a warranty claim send the defective part or item to Hobby Services at the address below Hobby Services 3002 N Apollo Dr Suite 1 Champaign IL 61822 USA Include a lett
8. 4 4454 5 5 DIE CUT PATTERNS cuco da 6 BUILD THE TAIL SURFACES 09 69 7 Build the Fin amp RUE iconos ci 7 Build the Stab Elevators inris 8 Hinge the Elevators eee seeeeeeseeseereseeeeeeenereaes 8 BUILD THE WING oia 11 Build the Wing Panels ii 11 Make the Allerons siciliana ond 16 Join TMS WIND iii 17 Finish The WIND aida ni iiaii 18 BUILD THE 5 55 19 Frame the Fuselage iconos ri 19 Mount the WING 1 Install the Guide Tubes Fuel Tank 8 Engine 22 Build the Front l rtlgdoCkK ireann aeia aa 24 Build the Rear Turtledeck ooooonnonnnonnncnononnoncnnerancarnnrannns 25 COVER THE MODEL 5 0 095 04 59 509 999 28 Prepare the Model for COVeriOQ ocococcnnccncnnocnnoncnnncnananananananos 28 Cover the Model viii cid 29 FINAL ASSEMBLY cia 30 Glue on the Stab amp Fl icono oi 30 Join the Control Surfaces ooooonccninonnononnonacnannonennnnanarno ren nanernaos 31 Hook Up the Controls sides 31 Complete the Radio Installation
9. 7 t hnique to align the stab J 9 Use the pin and string tec this time the T pin will be stuck into the sheeting over the top middle stringer in the front of the fuselage Once the stab has been centered stick another T pin into the rear of the stab 10 Cut a hinge block for the tail gear from leftover 1 4 x 1 2 6 4 x 13mm balsa and glue it into position d 11 Cut two 6 1 4 tail fillet blocks from the 3 4 x 1 1 4 x 18 19 x 32 x 460mm balsa block 27 TAIL FILLET SPACER J 12 Remove the stab from the fuselage Using a piece of leftover 1 4 x 1 1 2 6 4 x 38mm balsa as a fin spacer place the fillet blocks on the fuselage with the spacer in between where the fin would be Center the rear of the spacer between the fuselage sides and center the front on the top middle stringer Use a straightedge to make sure the spacer is centered Hold the spacer in place with a T pin in the front and the back J 13 Glue the tail fillet blocks to the fuselage but not to the spacer 4 m blocks Shape the spacer as shown on the fin spacer 14 Remove the spacer without disturbing the tail fillet template on the plan Reinsert the spacer Use a carving knife to carefully whittle down the fillet blocks around the spacer When you start getting close to the final shape switch to a razor plane followed by a bar sander 5 15 Remove the spacer Without using any glue install the stab a
10. 113g aerosol CA activator GPMR634 CA applicator tips HCAR3780 CA debonder GPMR6039 Epoxy brushes 6 GPMR8060 Mixing sticks 50 GPMR8055 Mixing cups GPMR8056 Master Airscrew Razor Plane MASR1510 Builder s Triangle Set HCAR0480 Great Planes Precision Hinge Marking Tool GPMR4005 Curved tip canopy scissors for trimming plastic parts HCARO667 Robart Super Stand ll ROBP1402 Microballoons TOPR1090 Threadlocker thread locking cement GPMR6060 Denatured alcohol for epoxy clean up K amp S brass tubing 1 8 3 2mm 1 4 6 4mm 5 16 8mm K amp S 801 Kevlar thread for stab alignment K SR4575 Switch amp Charge Jack Mounting Set GPMM1000 Rotary tool such as Dremel Moto Tool Servo horn drill HCARO698 Dead Center Engine Mount Hole Locator GPMR8130 AccuThrow Deflection Gauge GPMR2405 Slot Machine 110V GPMR4010 CG Machine GPMR2400 Precision Magnetic Prop Balancer TOPQ5700 ENE OS EASY TOUCH BAR SANDER A flat durable easy to handle sanding tool is a necessity for building a well finished model Great Planes makes a complete range of Easy Touch Bar Sanders and replaceable Easy Touch Adhesive backed Sandpaper While building the Rapture 40 two 5 1 2 140mm Bar Sanders and two 11 280mm Bar Sanders equipped with 80 grit and 150 grit Adhesive backed Sandpaper were used 5 1 2 140mm Bar Sander GPMR6169 11 280mm Bar
11. 13mm screws Drill 1 16 1 6mm holes for the screws Use a fine point ballpoint pen to draw the outline of the straps onto the sheeting le aM 4 3 Remove the screws and straps Use a hobby knife to cut and remove the sheeting around the lines marking the straps Hint A 5 16 8mm brass tube sharpened on the end may be used to cut the sheeting over the ends of the straps TEE 1 4 Refit the gear with the straps and screws I 5 Glue the die cut plywood aileron servo tray to the top of the wing centered over the servo opening Set the wing aside and get started on the fuselage BUILD THE FUSELAGE Frame the Fuselage Note Unless otherwise noted all parts used to build the fuselage are die cut plywood 1 1 Use medium CA to glue one of the wing saddle doublers to one side of one of the fuselage sides Glue the other wing saddle doubler to the other side of the other fuselage side Be certain to make a right and a left by making two mirrored assemblies 7 2 Place the bottom view of the fuselage plan over your flat building board and cover it with Plan Protector or wax paper 19 L 3 Glue the back of F1A to the front of F1B From now on this assembly will be referred to as the firewall J 4 Drill 1 16 1 6mm holes through the punchmarks in F2B Drill 3 32 2 4mm holes through the punchmarks in the tank tray reta
12. 4 13 x 19 x 19mm maple landing gear block to the top of a 1 2 x 3 4 x 6 1 4 13 x 19 x 160mm landing gear rail The block should be 3 8 10mm from one end of the rail and the wood grain on the block should run the same direction as the rail Make another assembly the same way Set the assemblies aside and get to work on the rest of the wing while the epoxy hardens WING JIG 3 32 x 1 4 x 9 LF 1 4 x 1 4 x 28 J 2 Cut 9 230mm from a 3 32 x 1 4 x 24 2 4 x 6 4 x 610mm balsa stick Cut 2 50mm from a 1 4 x 1 4 x 30 11 6 4 x 6 4 x 760mm balsa stick Glue the 9 230mm stick on top of one end of the 28 710mm stick to make the wing jig Start with the left panel so yours looks like the photos the first time through 1 J 3 Position the left wing panel plan over your flat building board and cover it with Plan Protector or wax paper Refer to this photo for the following three steps J 4 Pin the wing jig over its location on the plan with the ends protruding beyond the root and tip ribs The end with the 9 230mm piece goes toward the root end of the wing panel TWO WARPED SPARS INSTALLED THIS WAY WILL RESULT INA STRAIGHT WING E TWO WARPED SPARS INSTALLED THIS WAY WILL RESULT IN A WARPED WING J L 5 Inspect the four 3 8 x 3 8 x 30 9 5 x 9 5 x 760mm balsa wing spars included with this kit Note any warps that may be present If any o
13. 6 genen 6 95 56 65 one Meca 8 67 96 2870 F 5 quan BER KORUEN 102 a a NEO Matis E oe AGE BOTTOM VIEW o ia eee bie DIE CUT 3 PLY DIE CUT 3 PLY COVERING LA TT pront PER 1 Ne 5652 lon Sw 898 9 mo AET BOTONS A AND WNG REMOVED FOR CLARITY FEE FIN SPACER TEMPLATE 141 11 Mo Mane FIN BASE STAB LE BRACE NR hel ele 7 AA ar 3 PLY CROSS SECTION AT FORMER Eee TUE EEE 0 era OSES TON AT occur 3 ay 5 ALE DET BY ag 25 rr i e PESE cm E RS TURTLE Dy Ep Decir Fron 0 PEE oy ew Meas rn a 1 EME NE CUT 1 18 BALSA A MER P Pa VREF een nog mugen 2 lt a ij p m E a ar i fap 55 AS STZ dl 2 2 wig conan Py 1 as cpg a ie pe cut 3 PLY
14. Model Laterally d 1 With the wing level have an assistant help you lift the model by the engine propeller shaft and the bottom of the fuse under the TE of the fin Do this several times 1 2 If one wing always drops when you lift the model it means that side is heavy Balance the airplane by adding weight to the other wing tip An airplane that has been laterally balanced will track better in loops and other maneuvers PREFLIGHT Identify Your Model No matter if you fly at an AMA sanctioned R C club site or if you fly somewhere on your own you should always have your name address telephone number and AMA number on or inside your model It is required at all AMA R C club flying sites and AMA sanctioned flying events Fill out the identification tag on page 41 and place it on or inside your model Charge the Batteries Follow the battery charging instructions that came with your radio control system to charge the batteries You should always charge your transmitter and receiver batteries the night before you go flying and at other times as recommended by the radio manufacturer Note Checking the condition of your receiver battery pack is highly recommended All battery packs whether its a trusty pack you ve just taken out of another model or a new battery pack you just purchased should be cycled noting the discharge capacity Oftentimes a weak battery pack can be identified and a valuable m
15. R C and other components so that the model operates correctly on the ground and in the air 6 You must check the operation of the model before every flight to insure that all equipment is operating and that the model has remained structurally sound Be sure to check clevises or other connectors often and replace them if they show any signs of wear or fatigue 7 If you are not already an experienced R C pilot you should fly the model only with the help of a competent experienced R C pilot 8 While this kit has been flight tested to exceed normal use if the plane will be used for extremely high stress flying such as racing the modeler is responsible for taking steps to reinforce the high stress points We as the kit manufacturer provide you with a top quality thoroughly tested kit and instructions but ultimately the quality and flyability of your finished model depends on how you build it therefore we cannot in any way guarantee the performance of your completed model and no representations are expressed or implied as to the performance or safety of your completed model Remember Take your time and follow the instructions to end up with a well built model that is straight and true Before starting to build compare the parts in this kit with the Parts List and note any missing parts Also inspect all parts to make sure they are of acceptable quality If any parts are missing broken or defective or if you hav
16. base Do not cut the V in the leading edge until instructed to do so Set the fin and rudder aside for now Build the Stab amp Elevators 7 1 Cut out the stab plan or position the plan so it is over your flat building board Cover with Great Planes Plan Protector or wax paper 7 2 The same way you cut the fin base for the fin use the stab leading edge brace template on the plan to cut the stab leading edge brace from the 1 4 x 1 1 2 x 36 6 4 x 38 x 914mm balsa stick Pin the brace to the plan J 3 Finish building the stab from the remainder of the 1 4 x 1 4 x 36 6 4 x 6 4 x 914mm balsa stick and the remainder of the 1 4 x 2 1 4 x 24 6 4 x 57 x 610mm balsa sheet used to build the fin an additional 1 4 x 1 4 x 36 6 4 x 6 4 x 914mm balsa stick and two more 1 4 x 1 2 x 36 6 4 x 13 x 914mm balsa sticks 8 J 4 Make both elevators from the remainder of the 1 4 x 1 1 2 x 36 6 4 x 38 x 914mm balsa sheet used to make the stab leading edge brace Do not cut the V on the leading edge until instructed to do so Hinge the Elevators amp Rudder NOTES ABOUT CA HINGES This kit is supplied with CA hinge material consisting of a 3 layer lamination of Mylar and polyester specially made for hinging model airplanes When properly installed this type of CA hinge provides the best combination of strength durability and easy installation We use these hinges on all
17. bearing tube Hint Add a small dab of petroleum jelly to the end of the bearing tube to keep epoxy from getting in 1 LJ 5 Glue the shaped wing trailing edge to the wing The wing trailing edge should extend past the root end of the wing by approximately 1 32 0 8mm so the angle can be sanded to match R1 LJ 6 Sand the top bottom and end of the shaped wing trailing edge as necessary to blend with the rest of the wing J L 7 Prepare the other shaped wing trailing edge for the right wing and glue it into position the same way Note Be certain to cut the groove in the correct location so as not inadvertently make another left side 1 8 Fit one of the 24 609mm shaped balsa ailerons up to the wing If necessary trim one end of the aileron so there will be an approximately 3 32 2 4mm gap on both ends J LI 9 The same as was done for the elevators mark the location for the torque rod on the aileron then drill a 1 8 3 2mm hole and cut the groove Mark and cut all the hinge slots as well 1 LJ 10 Cut eight more 3 4 x 1 19 x 25mm CA hinges Test fit the aileron to the wing with four of the hinges Make adjustments where necessary 1 11 Remove the aileron from the wing and shape the leading edge to a V as shown on the plan J I 12 Test fit the aileron to the wing and torque rod with the hinges Use the torque rod to move the aileron up and down to make sure you can achieve 1 2 13mm of
18. both up and down aileron throw as shown in the control throws chart on page 36 7 13 Make the aileron for the right wing the same way Join the Wing J 1 Use medium CA or epoxy to glue together three die cut 1 8 3 2mm plywood wing joiners four are supplied but only three are used J 2 Test fit the wing joiner in one wing half then the other Test join the wings with the joiner Make any adjustments necessary for a good fit Sometimes the ends of the wing require a little fine tuning with a bar sander or the edges of the joiner might need to be sanded a little 17 2 3 8 3 8 J 3 With the wings temporarily fit together lay one wing panel flat on your workbench and measure the distance between the bottom of the other panel under the bottom spar at the tip The distance should be 2 3 8 60mm plus or minus 3 8 10mm If you are not able to achieve this measurement within the 3 8 10mm tolerance separate the wing halves and look for anything that may interfere with the fit such as glue blobs inside the wings where the joiner goes Note It is more important to have a good fit between the joining wing panels than it is to have exactly 2 3 8 60mm of dihedral J 4 Gather all the items required for joining the wing 30 minute epoxy a mixing cup and mixing stick an epoxy brush masking tape paper towels and denatured alcohol for clean up Note When joining critical compo
19. down thus causing the noise In extreme cases if not detected immediately flutter can actually cause the control surface to detach or the flying surface to fail thus causing loss of control followed by an impending crash The best thing to do when flutter is detected is to slow the model immediately by reducing power then land as soon as safely possible Identify which surface fluttered so the problem may be resolved by checking all the servo grommets for deterioration or signs of vibration Make certain all pushrod linkages are secure and free of play If it fluttered once under similar circumstances it will probably flutter again unless the problem is fixed Some things which can cause flutter are Excessive hinge gap Not mounting control horns solidly Poor fit of clevis pin in horn Side play of wire pushrods caused by large bends Excessive free play in servo gears Insecure servo mounting and one of the most prevalent causes of flutter Flying an over powered model at excessive speeds Takeoff Before you get ready to takeoff see how the model handles on the ground by doing a few practice runs at low speeds on the runway Hold up elevator to keep the tail wheel on the ground If necessary adjust the tail wheel so the model will roll straight down the runway If you need to calm your nerves before the maiden flight shut the engine down and bring the model back into the pits Top off the fuel then check al
20. in balsa provides a much cleaner more accurate hole than would a regular drill bit The sharpening procedure below works on any size of hobby tubing available from K amp S at hobby shops craft stores and hardware stores Sharpen the outside of the tube using a fiber reinforced cut off wheel or a metal file If using a cut off wheel be certain to use the reinforced variety and always wear safety glasses Use a hobby knife with a 11 blade to sharpen the inside of the tube by rolling it on a wood block The tube can be turned either by hand or by an electric drill After the hole has been cut the material will usually stick inside the tube The balsa plug can be removed with a wire or the next size smaller tube 3 2mm brass tube sharpened on the end or a hobby knife to cut a groove in both elevators to accommodate the joiner wire d 13 Test fit the elevators to the stabilizer with the joiner wire Make any adjustments necessary for a good fit d 14 The same as was done for the rudder bevel the leading edge of both elevators Make sure you can get 1 2 13mm of both up and down elevator throw Set the elevators and rudder aside while building the wing BUILD THE WING Build the Wing Panels L aa 9 5mm LANDING GEAR gt GRAIN lt gt BLOCK 4 1 Use 30 minute epoxy to glue a 1 2 x 3 4 x 3
21. line K SR4575 Slip the loop in the string over the T pin J 5 Fold a piece of masking tape over the string near the other end and draw a sharp arrow on it Slide the tape along the string and align the arrow with one end of the wing as shown in the photo Swing the string over to the same position on the other end of the wing Pivot the wing and slide the tape along the string until the arrow aligns with both ends of the wing Now the wing will be centered J 6 Bevel the front and both ends of one side of the bolt plate BP as shown in the photo Glue the bolt plate to the bottom of the wing centered on the fuselage 22 J 7 Recheck the wing alignment Using the holes in the bolt plate as a guide drill 7 201 5mm or 13 64 holes through the wing and wing bolt plate in the fuselage Be certain to hold the drill perpendicular to the bottom of the wing z HE Pr J 8 Remove the wing from the fuselage Thread the holes in the wing bolt plate with a 1 4 20 tap Add a few drops of thin CA to the threads in the holes and allow to fully harden Run the tap back through then repeat the procedure one more time LJ 9 Enlarge the bolt holes in the wing with a 17 64 6 4mm or 1 4 6 8mm drill Mount the wing to the fuselage with two 1 4 20 nylon bolts to see how it all fits the bolts may be cut down to 1 1 4 30mm Install the Guide Tubes Fuel Tank amp Engine
22. our models but it is essential to install them correctly Follow the hinging instructions in this manual for the best result The techniques shown have been developed to ensure thorough and secure gluing LJ 1 Use a Great Planes Precision Hinge Marking Tool GPMR4005 to mark the centerline all the way down the leading edge of the rudder If you don t have a Hinge Marking Tool use a fine point ballpoint pen to mark the centerline as shown The pen or the rudder may have to be raised from the workbench so the line will be on center J 2 Mark the locations of the hinge slots on the fin and rudder where shown on the plan 7 3 Use a Great Planes Slot Machine to cut hinge slots on the centerlines at the marks If you do not have a Slot Machine use a 11 hobby blade to cut the hinge slots Start by making a small slit Then working in small increments go a little deeper moving the blade back and forth Note that it s the back of the blade that does the work p 25mm e a 19mm O gt Trim the Corners LJ 4 Cut three 3 4 x 1 19 x 25mm CA hinges from the supplied 2 x 9 50 x 230mm CA hinge strip Snip off the corners so they go in easier 4 PAM i i 5 Test fit the rudder to the fin with the hinges Make adjustments where necessary for a good fit Hint Now that the rudder and fin are together temporarily this would be the perfect opportunit
23. the fuselage top and formers Use some of the leftover balsa sticks cut from the ends of the wing to hold the fuselage sides to the fuselage top J 10 Use thin and medium CA to glue the fuselage sides to the fuselage top and formers aft of F2 Do not glue the fuselage sides to the fuselage top forward of F2 Making sure all glue joints are tight and fit well is the way to a true and square fuselage WING BOLT PLATE MOUNTS LJ 11 Glue both wing bolt plate mounts to both sides of the fuselage The bottom of the plates should align with the bottom of the wing saddles Glue both wing bolt plates together then securely glue them into position J 12 Test fit then glue the aft fuselage bottom into position 13 Place the wing on the fuselage Taking accurate measurements center the centerline of the wing the glue joint between the two joining halves in the fuselage Place weights on top of the wing to hold it down J 14 Using the dowel holes in F2 as a guide drill the holes in the leading edge of the wing with a 1 4 6 4mm drill or a 1 4 6 4mm brass tube sharpened on the end As the fuselage sides have not been glued to the fuselage top forward of F2 the sides can be spread apart if necessary to accommodate the drill 21 EE E eee LJ 15 Use 30 minute epoxy and a few clamps to securely glue the firewall into position Be certain the top of the firewall is f
24. the paper J 2 Use the pattern on the plan to cut the fin base from the 1 4 x 2 1 4 x 24 6 4 x 57 x 610mm balsa sheet Repositionable spray adhesive may be used to temporarily stick the pattern to the balsa sheet or the pattern can simply be traced onto the sheet Use a straightedge and a hobby knife to cut out the part J 3 Pin the fin base to the building board over its location on the plan PRES wo MAKE CUT MARK 1 4 x 1 4 BALSA OUT FNCA 131 J 4 Build the rest of the fin framework from a 1 4 x 1 2 x 36 6 4 x 13 x 914mm balsa stick and a 1 4 x 1 4 x 36 6 4 x 6 4 x 914mm balsa stick Use medium CA to glue the parts together and use T pins to hold them down as you go Hint The easiest most accurate way to cut the small sticks is to place the stick over the structure use a single edge razor blade to make cut marks then cut the rest of the way through the stick over your workbench A miter box is also helpful for cutting 90 angles on some of the larger balsa sticks J 5 Remove the fin from the plan Use a bar sander with 80 grit sandpaper to sand both sides flat and round the tip and leading edge Follow with 220 grit sandpaper Final sanding will be done later J 6 Make the rudder as shown on the plan from the remainder of the 1 4 x 2 1 4 x 24 6 4 x 57 x 610mm balsa sheet used to make the fin
25. 0 minutes The sawing action of its two blades cuts through wood even hard spots without gouging or compressing it like knife blades do The result is a clean consistent slot with room for CA to wick all around and form a dependable bond The Slot Machine comes fully assembled with two pre installed replaceable blades and a rugged plastic body U S Pat 6 096 357 GPMR4010 BUILDING NOTES Kit Purchased Date Where Purchased Date Construction Started Date Construction Finished Finished Weight Date of First Flight FLIGHT LOG 43 TWO VIEW DRAWING Use copies of this page to plan your trim scheme 855 FIL MASHER DIE CUT 3 PLY 3 PLY ES OS j hos Log waster 5 32 NUT 9543 PLY de WNG BOLT E Tirmo FON AFT ELSE TOF FASUNK APT FUSE SIE FS ae 8 22 1 3 4 sucs fi ASN 52 85 4 x 3 4 SOREN Nog x 1 2 SEET etal Screw 1 a 24 0 BALSA mD DESIGNED BY MIKE CROSS Ad i INSTRUCTIONS BY TIM LAMPE 12222 CONTROL HORN F
26. 0mm from the connector Now the ailerons d 16 Cut a small notch in the aileron servo tray to accommodate the aileron servo wire Refer to this photo for the following two steps TORQUE ROD J 17 Mount the aileron servo in the wing The same as you should be doing all along don t forget to harden the screw holes with thin CA Make a two arm servo arm by cutting off the unused arms 18 Thread a torque rod horn onto each torque rod until the top of the horn is even with the top of the torque rod Make the aileron pushrods and connect them to the aileron servo and the torque rod horns the same way you did the elevators and rudder 19 Mount the main landing gear in the wing using the screws and straps Complete the Radio Installation J 1 Make the receiver tray and battery tray by gluing the balsa and plywood parts together as shown When over turned you will be able to slip tape or Velcro around the trays to hold the battery pack and receiver down 7 2 Wrap the receiver and battery in 1 4 6mm R C foam rubber Hold the foam in place with small rubber bands or tape Mount the receiver and battery to the trays with tape or Velcro 34 slide block to the switch J 3 Mount the on off receiver battery switch to the side of the fuselage opposite the engine exhaust There are cut outs in the fuselage sides that should accommodate most types of switches The model s
27. 6 Place the elevator rudder and throttle servos on the servo rails in the fuselage Make three one arm servo arms by cutting off the unused arms If using Futaba servos use the shorter six arm servo arms instead of the four arm servo arms If using another brand of servos the arms must be short enough so they do not interfere with the other servos Enlarge the holes in only the rudder and elevator servo arms with a 5 64 2mm drill or a Hobbico Servo Arm Drill Install the arms on the servos Oe LJ 7 Hold the rudder pushrod over the outer hole in the rudder servo arm Push or pull on the pushrod to center the rudder Use a fine point felt tip pen to mark the pushrod where it crosses the hole in the arm _ FASLINK J 8 Disconnect the rudder pushrod from the rudder control horn Make a 90 bend in the pushrod at the mark Slip a nylon Faslink over the pushrod and snap it into place Cut the pushrod approximately 1 16 2mm above the Faslink as shown in the photo 9 Connect the pushrod to the outer hole in the rudder servo arm using the Faslink Reconnect the clevis on the other end of the pushrod to the rudder control horn J 10 Cut the elevator pushrod and mount it to the elevator servo arm the same way d 11 Use an extended 1 16 1 6mm drill or a Great Planes Engine Mount Hole Locator drill to drill holes into the servo rails for mounting the servos it s okay if some of th
28. 64 3 6mm 5 32 4mm 20 or 5 32 4mm 3 16 4 8mm 15 64 6mm 1 4 6 4mm LI 1 4 20 Tap and 7 5mm or 13 64 5 2mm drill or 1 4 20 tap and drill set GPMR8105 _I Tap handle GPMR8120 1 Small metal file I Stick on segmented lead weights GPMQ4485 J 1 Hobby knife HCARO105 11 Blades 5 pack HCARO211 LJ 11 Blades 100 pack HCARO311 LJ Single edge razor blades 10 pack HCARO212 I Flat building board see Important Building Notes on page 4 I Medium T pins 100 HCAR5150 I Sanding tools and sandpaper assortment see Easy Touch Bar Sander section Covering amp Covering Tools Two rolls of covering will be required to cover this model The following colors are those on the model featured on the kit box cover White TOPQ0204 True Red TOPQ0227 Cub Yellow TOPQ0220 Medium Purple TOPQ0225 The following tools are also recommended for applying the covering E 3 Top Flite MonoKote sealing iron TOPR2100 Top Flite Hot Sock iron cover TOPR2175 Top Flite MonoKote trim seal iron TOPR2200 Optional Supplies amp Tools Here is a list of tools mentioned in the manual that will help you build the Rapture 40 DECOcoco O COCcocacdoa Uo Razor saw and miter box set HCARO240 4 40 Tap and 43 2 2mm drill or 4 40 tap and drill set GPMR8101 2 oz 57g Spray CA activator GPMR6035 or 4 oz
29. Plus is for you lts fully symmetrical NACA63014 airfoil and large control surfaces support the most outrageous 3D moves imaginable Cut speed to a crawl however and handling becomes smooth and predictable enough for inexperienced low wing fliers The kit features CAD engineered self aligning all wood parts plus fixed landing gear or you can install optional retracts not included No specialty or digital servos are required with low cost standard servos you ll enjoy spectacular maneuvers GPMA0390 41 Futaba 4YF 4 Channel FM Radio Receiver R127DF Servos S3004 4 Look at the price the features and the performance of the 4YF and you ll see why its the most popular 4 channel around Its FM technology is complemented with NiCds a charger easy access trims and a dual conversion 7 channel receiver Two LEDs instantly show battery power status The trainer system features a spring loaded toggle switch instead of a button so it s easy to hold on and automatically turns off when you release it The trainer jack now features a micro pin connector port for less clutter with the optional cord Available on 72 or 75MHz FUTJ40 Mo Say O S Engines 40 LA Never before has a mid size sport engine been so powerful dependable and user friendly The 40 LA s remote needle valve increases your safety while making adjustments An allen screw makes it easy to add an optional needle extension for vers
30. Sander GPMR6170 12 3 66m roll of Adhesive backed 80 grit sandpaper GPMR6180 12 3 66m roll of Adhesive backed 150 grit sandpaper GPMR6183 Assortment pack of 5 1 2 140mm strips GPMR6189 Top Flite 320 grit TOPR8030 4 sheets and 400 grit TOPR8032 4 sheets wet or dry sandpaper is also recommended for finish sanding IMPORTANT BUILDING NOTES A flat building board that you can stick T pins into is required Most of the building is done by pinning the parts over their location on the plan laid over the building board The 16 x 36 x 3 4 410 x 910 x 19mm Great Planes Pro Building Board GPMR6948 is suggested A piece of 2 x 4 610 x 1220mm Celotex ceiling tile is also suitable Of course the building board won t be flat unless the workbench beneath it is flat as well There are two types of screws used in this kit Sheet metal screws are designated by a number and a length mumu For example 6 x 3 4 20mm This is a number six screw that is 3 4 20mm long Machine screws are designated by a number threads per inch and a length SHCS is just an abbreviation for socket head cap screw and that is a machine screw with a socket head N 8223898878799988 For example 4 40 x 3 4 20mm This is a number four screw that is 3 4 20mm long with forty threads per inch When you see the term test fit in the instructions it Whenever the term glue is written
31. a the Internet at http www modelaircraft org SINCE 1936 ADDITIONAL ITEMS REQUIRED Hardware amp Accessories This is the list of hardware and accessories required to finish the Rapture 40 Order numbers are provided in parentheses 40 50 cu in 6 5 8 0cc Two stroke or 40 52 cu in 6 5 8 5cc four stroke engine 4 channel Radio control system with four standard servos Suitable propeller and spare propellers 6 150mm Servo extension for aileron servo HCAM2701 for Futaba 1 4 6mm R C foam rubber HCAQ1000 8 oz 240cc Fuel tank GPMQ4103 3 900mm Standard silicone fuel tubing GPMQ4131 2 1 2 65mm Wheels GPMQ4223 2 1 2 65mm Spinner white GPMQ4520 black GPMQ4521 red GPMQ4522 1 25mm Tail wheel GPMQ4241 William s Brothers 185 1 5 scale sportsman pilot WBRQ2485 Acrylic paint and paint brushes for painting pilot found at craft stores Adhesives amp Building Supplies In addition to common household tools screwdrivers drill etc this is the short list of the most important items required to build the Rapture 40 We recommend Great Planes Pro CA and Epoxy glue LO UO Oe Li 1 1 02 30g Thin Pro CA GPMR6002 LJ 1 02 30g Medium Pro CA GPMR6008 LJ Pro 30 minute epoxy GPMR6047 J HobbyLite balsa colored balsa filler HCAR3401 14 Plan Protector GPMR6167 or wax paper J Drill bits 1 16 1 6mm 3 32 2 4mm 1 8 3 2mm 9
32. and the receiver and transmitter on you should be able to walk at least 100 feet 30m away from the model and still have control Have an assistant stand by your model and while you work the controls tell you what the control surfaces are doing Repeat this test with the engine running at 38 various speeds with an assistant holding the model using hand signals to show you what is happening If the control surfaces do not respond correctly do not fly Find and correct the problem first Look for loose servo connections or broken wires corroded wires on old servo connectors poor solder joints in your battery pack or a defective cell or a damaged receiver crystal from a previous crash ENGINE SAFETY PRECAUTIONS Failure to follow these safety precautions may result in severe injury to yourself and others Keep all engine fuel in a safe place away from high heat sparks or flames as fuel is very flammable Do not smoke near the engine or fuel and remember that engine exhaust gives off a great deal of deadly carbon monoxide Therefore do not run the engine in a closed room or garage Get help from an experienced pilot when learning to operate engines Use safety glasses when starting or running engines Do not run the engine in an area of loose gravel or sand the propeller may throw such material in your face or eyes Keep your face and body as well as all spectators away from the plane of rotation o
33. atility with engine positioning For easy fuel line access the fuel inlet points upward And for years of maximum performance O S strengthened the crankcase and increased cooling fin area Includes 2 year warranty protection and muffler OSMG0041 Great Planes C G Precision Aircraft Balancer Accurate balancing makes trainers more stable low wings more agile and pylon planes move at maximum speed The innovative C G Machine helps you achieve optimum balance easily without measuring or marking and without the errors that fingertip balancing can cause You ll quickly pinpoint your plane s exact center of gravity Then you ll know at a glance whether weight should be added removed or relocated The C G Machine works with kits and ARF models of any size and wingspan lts slanted wire balancing posts support models weighing up to 40 pounds GPMR2400 Jeo A XES MOMO Top Flite MonoKote Covering With all of MonoKote s advantages no wonder it s been the 1 choice of kit builders for over 25 years Over 50 high gloss cloud free colors give you endless creative options Stronger and thicker than most films MonoKote helps you avoid rips and heat damage during application yet it s also flexible enough to conform easily to curves and contours And once applied MonoKote stays in place with a firm fuelproof grip Its permanently bonding adhesive formula prevents nitro from sneaking under the sea
34. ave already mastered their high wing trainer And it s also perfect for modelers who have already mastered flying but haven t yet built a model from a kit For the latest technical updates or manual corrections to the Rapture 40 visit the Great Planes web site at www greatplanes com Open the Airplanes link then select the Rapture 40 If there is new technical information or changes to this model a tech notice box will appear in the upper left corner of the page PROTECT YOUR MODEL YOURSELF 8 OTHERS FOLLOW THESE IMPORTANT SAFETY PRECAUTIONS 1 Your Rapture 40 should not be considered a toy but rather a sophisticated working model that functions very much like a full size airplane Because of its performance capabilities the Rapture 40 if not assembled and operated correctly could possibly cause injury to yourself or spectators and damage to property 2 You must assemble the model according to the instructions Do not alter or modify the model as doing so may result in an unsafe or unflyable model In a few cases the instructions may differ slightly from the photos In those instances the written instructions should be considered as correct 3 You must take time to build straight true and strong 4 You must use an R C radio system that is in first class condition and a correctly sized engine and components fuel tank wheels etc throughout the building process 5 You must correctly install all
35. ay interfere with final sanding or covering such as the landing gear tail gear engine etc Final sand the model with progressively finer grades of sandpaper finishing up with 320 or 400 grit J 3 Use a tack cloth compressed air or a shop vac with a brush attachment to remove all balsa dust from the model Cover the Model J 1 Gather the covering and tools you will use to cover the model including plenty of new 11 blades a metal straightedge a covering iron with a covering sock and spare covering socks and a trim iron Some builders prefer to use single edge razor blades for trimming excess covering from the model J 2 Cover the separate parts of the model in the order you prefer or follow the suggested covering sequence Tail Parts 29 7 1 Cover the bottom of one side then the other side of the stabilizer first Apply the covering up to the lines you marked noting the sides of the fuselage Cut the front tip and back edges of the covering with a straightedge before sealing the edges down but leave a small handle that you can hold onto to remove wrinkles around the corner 7 2 Cover the top of both sides of the stab the same way then cover one side then the other of the fin elevators and rudder J 3 Cut a small strip of covering from all the hinge slots Fuselage L 1 Cover the bottom of the fuselage first When you get to the front use a trim iron t
36. covering from the slots in the fuselage for the stab and fin Test fit the stab and fin into the fuselage Make any adjustments necessary Note The best way to glue in the stab is to apply epoxy to both the top and bottom of the stab and to the stab saddle and the tail blocks in the fuselage This gets a little messy as some epoxy will be deposited on one half of the stab when you slide it in but before the epoxy hardens it can be cleaned off with paper towels and alcohol Applying epoxy in the fuselage and to the stab is the best way to ensure a secure bond J 2 Bolt the wing to the fuselage Apply 30 minute epoxy to both sides of the stab and in the fuselage to the stab saddle and the tail blocks Don t forget to install the elevator joiner wire then slide the stab into position Wipe away epoxy that was deposited on the stab with paper towels and alcohol The same as was done before the model was covered use the pin and string to align the stab View the model from the rear and make sure the stab is aligned with the wing If necessary place weight on the high side of the stab to get it to align with the wing Allow the epoxy to fully harden before proceeding J 3 Glue the fin into position the same way Use a Hobbico Builder s Triangle to make certain the fin is perpendicular to the stab If necessary tape can be used to pull the fin to one side or the other to get it vertical Join the Cont
37. e holes are at an angle to clear the wing bolt plate If you don t have a drill that is long enough you can make an extended drill by gluing a 1 16 1 6mm drill in a 3 32 2 4mm brass tube After drilling the holes the drill can be removed from the tube by heating with a match or a small torch Do not inhale any of the fumes from heated glue 1 12 Mount the servos using the wood screws that came with them Temporarily remove the screws then harden each screw hole with a few drops of thin CA Allow to fully harden J 13 Install the fuel tank with the fuel lines This can be done by guiding extra long lines through the holes in the firewall Connect the lines to the tank then guide the tank into position while simultaneously drawing the lines out Cut the lines to the correct length when connecting them to the engine 4 14 Mount the engine mount and engine Thread a nylon clevis onto the remaining 36 910mm long pushrod Cut the pushrod to a length of 21 530mm Bend the pushrod as necessary so the clevis will align with the carburetor arm Guide the pushrod through the tube and connect the clevis to the carburetor arm with a silicone retainer 33 Retainer _ 5 gt h d 4 4 e 1 15 Connect the other end of the throttle pushrod to the throttle servo arm using a brass screw lock pushrod connector with a nylon retainer and a 4 40 x 1 8 3mm screw Cut the pushrod so it protrudes approximately 1 2 1
38. e any questions about building or flying this airplane please contact Great Planes at the address or telephone number below If requesting replacement parts please provide the full kit name Rapture 40 and the part numbers as listed in the Parts List Great Planes Product Support 3002 N Apollo Drive Suite 1 Champaign IL 61822 Telephone 217 398 8970 Fax 217 398 7721 E mail productsupport greatplanes com You can also check our web site at www greatplanes com for the latest Rapture 40 updates If you have not flown this type of model before we recommend that you get the assistance of an experienced pilot in your R C club for your first flights If you re not a member of a club your local hobby shop has information about clubs in your area whose membership includes experienced pilots In addition to joining an R C club we strongly recommend you join the AMA Academy of Model Aeronautics AMA membership is required to fly at AMA sanctioned clubs There are over 2 500 AMA chartered clubs across the country Among other benefits the AMA provides insurance to its members who fly at sanctioned sites and events Additionally training programs and instructors are available at AMA club sites to help you get started the right way Contact the AMA at the address or toll free phone number below Academy of Model Aeronautics 5151 East Memorial Drive S a A Muncie IN 47302 gt Tele 800 435 9262 Fax 765 741 0057 Or vi
39. e nose drops the model is nose heavy and weight must be added to the tail to balance If possible start out by relocating the battery pack and or receiver to minimize or eliminate any additional 37 ballast required If additional weight is still required nose weight may be easily added by using a spinner weight GPMQ4645 for the 1 oz weight or GPMQ4646 for the 2 oz weight If spinner weight is not practical or is not enough use Great Planes GPMQ4485 stick on lead good place to add stick on nose weight is to the firewall or to the inside of one of the fuselage sides in front of the firewall To find out how much weight is required begin by placing incrementally increasing amounts of weight on the bottom of the fuselage over nose or tail until the model balances Once you have determined the amount and location of weight required it can be permanently attached Tail weight may be added by cutting the covering from the side of the fuselage and gluing it inside Cover the hole with another piece of covering Note Do not rely upon the adhesive on the back of the lead weight to permanently hold it in place Over time fuel and exhaust residue may soften the adhesive and cause the weight to fall off Use 2 wood screws RTV silicone or epoxy to permanently hold nose weight in place L 4 IMPORTANT If you found it necessary to add any weight recheck the C G after the weight has been installed Balance the
40. eee eee eee eeeeeeeees 34 Finish the COCKPIT ise 3 cased diciee ce ebdiss elec tevgadecesicids ipod aa 35 Apply the Decals siii 1 36 GET THE MODEL READY TO FLY 36 Check the Control Directions ooooococnoninnnonnonoonononarnrnanonnans 36 Set the Control TOrowS iii 36 Balance the Model C G cias mid 36 Balance the Model Laterally ooooconinnnncononnnnonnonnnoranarnraneno 37 PREFLIGHT coat 37 Identity Your Models ziei aae a E 37 Charge the Battori Siziano R 37 Balance the Propellers 11 nica 38 Ground CHECK src ot 38 Range CHECK iii te rte 38 ENGINE SAFETY 0 5 38 AMA SAFETY CODE 9 6 09 39 CHECK LIST coccion ici 39 FLYING ivi ie 39 Tak 40 2711 40 LONGING 85776 40 TWO VIEW DRAWING Back Cover Page FUSELAGE WING Center Pull Out Section Thank you for purchasing the Great Planes Rapture 40 The Rapture 40 is a dual purpose airplane lt s the perfect low wing trainer for pilots who h
41. el practice slow flight and execute practice landing approaches by reducing the throttle to see how the model handles at slower speeds Add power to see how she climbs as well Continue to fly around executing various maneuvers and making mental notes or having your assistant write them down of what trim or C G changes may be required to fine tune the model so it flies the way you like Mind your fuel level but use this first flight to become familiar with your model before landing Landing To initiate a landing approach lower the throttle while on the downwind leg Allow the nose of the model to pitch downward to gradually bleed off altitude Continue to lose altitude but maintain airspeed by keeping the nose down as you turn onto the crosswind leg Make your final turn toward the runway into the wind keeping the nose down to maintain airspeed and control Level the attitude when the model reaches the runway threshold modulating the throttle as necessary to maintain your glide path and airspeed If you are going to overshoot smoothly advance the throttle always ready on the right rudder to counteract torque and climb out to make another attempt When you re ready to make your landing flare and the model is a foot or so off the deck smoothly increase up elevator until it gently touches down Once the model is on the runway and has lost flying speed hold up elevator to place the tail on the ground regaining tail wheel control
42. er stating your name return shipping address as much contact information as possible daytime telephone number fax number e mail address a detailed description of the problem and a photocopy of the purchase receipt Upon receipt of the package the problem will be evaluated as quickly as possible READ THROUGH THIS MANUAL BEFORE STARTING Sy CONSTRUCTION IT CONTAINS IMPORTANT SE GREATELANEs INSTRUCTIONS AND WARNINGS CONCERNING THE vop Champaign IL ASSEMBLY AND USE OF THIS MODEL aiaa 6970 05 airsupport greatplanes com GPMZ0289 for GPMA0220 V1 0 Entire Contents Copyright 2003 Printed in USA TABLE OF CONTENTS INTRODUCTION INTRODUCTION iiron c 2 SAFETY 8 0 9 09 09 509095 9 49 2 ADDITIONAL ITEMS 8 6 850 3 1 6 1 52 10 9 11 1 999889 3 Adhesives amp Building 44 45 4456595 3 Covering amp Covering TOols isinin iniinis 4 Optional Supplies amp icon 4 IMPORTANT BUILDING NOTES 09 4 TYPES OF WOOD 1 5 METRIC 1 0 5 4
43. f the propeller as you start and run the engine Keep these items away from the prop loose clothing shirt sleeves ties scarfs long hair or loose objects such as pencils or screwdrivers that may fall out of shirt or jacket pockets into the prop Use a chicken stick or electric starter to start the engine Do not use your fingers to flip the propeller Make certain the glow plug clip or connector is secure so that it will not pop off or otherwise get into the running propeller Make all engine adjustments from behind the rotating propeller The engine gets hot Do not touch it during or right after operation Make sure fuel lines are in good condition so fuel will not leak onto a hot engine causing a fire To stop a glow engine cut off the fuel supply by closing off the fuel line or following the engine manufacturer s recommendations Do not use hands fingers or any other body part to try to stop the engine To stop a gasoline powered engine an on off switch should be connected to the engine coil Do not throw anything into the propeller of a running engine AMA SAFETY CODE excerpt Read and abide by the following Academy of Model Aeronautics Official Safety Code GENERAL 1 will not fly my model aircraft in sanctioned events air shows or model flying demonstrations until it has been proven to be airworthy by having been previously successfully flight tested 2 will not fly my model aircraft higher than a
44. f the spars are warped pair them up as shown in the sketch at the top to cancel out any warps LJ 6 Pin one of the wing spars over its location on the plan being certain if necessary to place it so any warp will be cancelled out by the top spar Note that the pins should be inserted at an angle so they do not interfere with the top spar when it is added later on Also note that the tip of the spar should end at the outer edge of rib R3 but the root end of the spar may extend beyond the root rib J J 7 Use medium CA or epoxy to glue the die cut 1 8 3 2mm plywood R2A rib doublers to the correct side of three die cut 3 32 2 4mm balsa R2 ribs as shown in the photo for the wing panel you are working on J 1 8 Use a straightedge and a hobby knife to cut partway through the outside of rib R1 between the spar notches as shown 12 J LJ 9 Using a small square to keep the ribs vertical glue all the ribs except ribs R1 to the bottom spar Also be certain the ribs are contacting the wing jig as you go LJ 10 Glue the top spar to the ribs again making sure the ribs remain vertical Don t forget to position the top spar to cancel out any warp that may have been in the bottom spar If any of the ribs lift from the wing jig use T pins to hold them down 1 LJ 11 Glue the die cut 1 8 3 2mm plywood forward and aft dowel plates into position Note the angle on one end of the do
45. hown in the manual uses the Great Planes Switch amp Charge Jack Mounting Set GPMM1000 This serves both as a switch mount and a charge jack mount for a battery charger or volt meter The setup must be mounted upright so the switch slide block must be tack glued to the switch with a small drop of medium CA so it doesn t fall off when overturned for mounting 51 4 Securely glue the receiver and battery trays in the fuselage where they will fit Make sure they do not interfere with the servos or on off switch It s best to mount the battery pack in front of the receiver LJ 5 Make a strain relief for the receiver antenna from a leftover servo arm Guide the antenna through the holes in the arm SMALL RUBBER TUBING J 6 The receiver antenna must be fully extended either inside or outside the fuselage To mount the antenna outside the fuselage drill a 3 32 2 4mm hole through former F 4 and drill a 1 8 3mm hole through the bottom of the fuselage Guide the antenna through F 4 and through a small piece of tubing in the bottom of the fuselage Tape the end of the antenna to the bottom of the fuselage Finish the Cockpit J 1 Use iron on covering or paint to make the cockpit the color of your choice On the model in the instruction manual the cockpit was covered with flat black MonoKote J 2 Test fit the pilot you will be using Trim the pilot where necessary to get him to fit in the cock
46. iner TTR LEFTOVER PLYWOOD J 5 Glue small pieces of leftover plywood to the front of F2B over the 1 16 1 6mm holes you drilled Glue F2A to the front of F2B Redrill the 1 16 1 6mm holes From now on this assembly will be referred to as F2 LJ 6 Use a ballpoint pen and a straightedge to draw a vertical line on the front of the firewall connecting the punchmarks in the middle Drill 5 32 4mm holes through the remaining four punchmarks Press four 6 32 blind nuts partway into the holes on the back of the firewall Add a few drops of medium CA to the blind nuts where they will contact the firewall then tap the blind nuts the rest of the way in with a hammer Wipe away excess CA If using the O S MAX 40 or 46 FX drill the 3 16 4 8mm hole in the back of the firewall for the throttle pushrod tube the rest of the way through If using a different engine do not drill the hole the hole for the throttle pushrod will be drilled later J 7 Pin the aft fuselage top upside down to the building board over its location on the plan You ll know it s upside down when the front aligns with the plan 20 S po J 8 Glue the die cut plywood formers F2 through F6 to the aft fuselage top Do your best to get the formers vertical but if they aren t perfect the notches in the fuselage sides will square em up anyway J 9 Join but do not glue the right and left fuselage sides to
47. l fasteners and control linkages for peace of mind Remember to takeoff into the wind When ready point the model straight down the runway hold a bit of up elevator to keep the tail on the ground to maintain tail wheel steering then gradually advance the throttle As the model gains speed decrease up elevator allowing the tail to come off the ground One of the most important things to remember with a tail dragger is to always be ready to apply right rudder to counteract engine torque Gain as much speed as your runway and flying site will practically allow before gently applying up elevator lifting the model into the air At this moment it is likely that you will need to apply more right rudder to counteract engine torque Be smooth on the elevator stick allowing the model to establish a gentle climb to a safe altitude before turning into the traffic pattern Flight For reassurance and to keep an eye on other traffic it is a good idea to have an assistant on the flight line with you Tell him to remind you to throttle back once the plane gets to a comfortable altitude While full throttle is usually desirable for takeoff most models fly more smoothly at reduced speeds 40 Take it easy with the Rapture for the first few flights gradually getting acquainted with it as you gain confidence Adjust the trims to maintain straight and level flight After flying around for a while and while still at a safe altitude with plenty of fu
48. ler to accurately measure and set the control throw of each control surface as indicated in the chart that follows If your radio does not have dual rates we recommend setting the throws at the low rate setting These are the recommended control surface throws High Rate Low Rate ELEVATOR 1 2 138mm up 3 8 9mm up 1 2 13mm down 3 8 9mm down RUDDER 1 25mm right 3 4 19mm right 1 25mm left 3 4 19mm left AILERONS 1 13mm up 3 8 9mm up 1 2 13mm down 3 8 9mm down IMPORTANT The Rapture 40 has been extensively flown and tested to arrive at the throws at which it flies best Flying your model at these throws will provide you with the greatest chance for successful first flights If after you have become accustomed to the way the Rapture flies you would like to change the throws to suit your taste that is fine However too much control throw could make the model difficult to control so remember more is not always better Balance the Model C G More than any other factor the C G balance point can have the greatest effect on how a model flies and may determine whether or not your first flight will be successful If you value this model and wish to enjoy it for many flights DO NOT OVERLOOK THIS IMPORTANT PROCEDURE A model that is not properly balanced will be unstable and possibly unflyable At this stage the model should be in ready to fly conditi
49. m from the end The wire is 5 32 4mm but using a 20 drill which is slightly larger than 5 32 4mm will make the gear a little easier to install and remove during construction J LJ 24 Use a hobby knife to round the edge of the hole to accommodate the bend in the gear y J 25 Slightly widen the groove in the rail by pushing one end of the gear back and forth This will also make it easier to install and remove the gear during test fitting and assembly LJ LJ 26 Test fit the gear in the rail Make adjustments where necessary 1 U 27 Use 30 minute epoxy to glue the previously prepared landing gear rail assembly into position on the bottom of the wing Be certain to get a secure glue joint between the maple landing gear block and the plywood doubler excess glue isn t required good contact is the way to a strong joint 1 LJ 28 With the gear in the rail use a ballpoint pen to mark the leading edge of the wing at both ends of the gear These marks will note the ends of a groove that will be cut in the sheeting for the gear 1 J 29 Sheet the remaining open section of the bottom of the wing panel with leftover 3 32 2 4mm balsa sheeting J LJ 30 Cut off the remaining portion of the spars leading edge and trailing edge so they are even or nearly even with R1 Do not cut off the leading edge at the tip Sand the spars and sheeting even with end ribs Also sand the trailing edge to match
50. ms which keeps your beautiful covering job intact season after season ee Se ee Top Flite Powerpoint Wood Propellers Lighter than maple props of the same size these fuelproofed beechwood props reduce rotational mass letting your engine produce more power with less work Wood construction also makes Power Point props stiffer 42 than nylon so they perform predictably throughout the full RPM range Their symmetric pitch reduces prop vibration and boosts thrust at any RPM a top choice for all fliers Great Planes AccuThrow Control Surface Deflection Meter One leading cause of crashes is flying an airplane with its control throws set differently from those recommended in the instructions The Great Planes AccuThrow lets you quickly and easily measure actual throws first so you can make necessary corrections before you fly Large no slip rubber feet provide a firm grip on covered surfaces without denting or marring the finish Spring tension holds AccuThrow s plastic ruler steady by each control surface Curved to match control motions the ruler provides exact readings in both standard or metric measurements GPMR2405 Great Planes Slot Machine Motorized Hinge Slotting Tool You probably dread cutting hinge slots for one project the job can take over an hour With the electric powered Slot Machine you ll safely and easily cut all of your kit s hinge slots in only about 1
51. nd elevator joiner wire into the fuse between the fillet blocks and the stab saddle Align the stab the same as before holding it in position with T pins you should be able to use the same pin holes thus recapturing the original alignment Use the pin and string to confirm the stab alignment then use a ballpoint pen to lightly mark the outline of both sides of the fuselage on the top and bottom of the stab Y J 16 Remove the T pins holding the stab in place Insert the fin and rudder into the fuselage and add the elevators to the stab Make any adjustments necessary for a good fit Mark the outline of the tail fillet blocks on both sides of the fin We ll be ready to start covering soon but first mount the tail gear TAIL GEAR BEARING J 17 Cut a slot in the hinge block for the nylon tail gear bearing on the tail gear Insert the bearing 28 18 The same as was done with the ailerons and elevators drill a 3 32 2 4mm hole and cut a groove in the rudder for the tail gear wire Test fit the rudder Make adjustments where necessary for a good fit COVER THE MODEL Prepare the Model for Covering 53 1 Remove the fuel tank Fuelproof the fuel tank compartment including the back of the firewall using epoxy epoxy thinned with denatured alcohol or fuelproof paint Only a light coating is required 1 2 Remove the wing stab and fin from the fuselage Remove any components that m
52. nents such as the wing halves it is imperative to coat all joining parts with epoxy In other words don t coat only one of the contacting end ribs Coat the end ribs of both wing panels Similarly don t just coat the joiner Also coat the insides of the wing where the joiners go LJ 5 Prepare approximately 3 4 oz 25cc of 30 minute epoxy Use a piece of wire or a small dowel to coat the inside of one of the wing halves where the joiner goes and the rib on the end of the panel Coat one half of the joiner then insert the joiner into the panel Working quickly before the epoxy starts to harden coat the inside and the end of the other panel and the protruding end of the joiner Fit the wings together Wipe away excess epoxy as it squeezes out Use several strips of masking tape to tightly hold the wing halves together wiping away excess epoxy as it is forced from between the panels Be certain both panels accurately align especially the leading and trailing edges Do not disturb the wing until the epoxy has hardened Finish the Wing Fit both landing gears at the same time 1 1 Remove all the masking tape Using the marks made earlier on the leading edge as a guide cut the slots in the bottom sheeting for both landing gears Test fit the gear Make adjustments where necessary 18 221 i 1 2 Temporarily mount the landing gear with four nylon landing gear straps and eight 2 x 1 2
53. o seal the edges down around the sides 7 2 Cover the top of the fuselage between the cockpit and the firewall next followed by the sides and the turtledeck Those who are less experienced with applying iron on covering could cover the turtledeck separately from the fuselage sides Wing 1 Cover the corner areas first When covering the corners at the aileron torque rods fold a piece of covering near the end then cut a hole with a 1 8 3mm brass tube sharpened on the end Since the model in the photos is red on the bottom and white on top two pieces of covering were first ironed together over a sheet of glass 2 Slip the covering over the torque rod then use a trim iron to iron it into place Trim the covering approximately 1 8 3mm around the edges then iron the edges down 30 J 3 Iron a piece of covering over the wing bolt plate before covering the rest of the wing Cover one side then the other side of the bottom of the wing then cover one side then the other side of the top of the wing 7 4 Cover the ends then the top and bottom of the ailerons J 5 The same as was done for the tail surfaces cut a strip of covering from all the hinge slots in the wing and ailerons J 6 Cut the covering from the bottom of the wing over the landing gear rails and the notches for the straps FINAL ASSEMBLY Glue on the Stab amp Fin J 1 If you haven t already done so cut the
54. odel saved by comparing its actual capacity to its rated capacity Refer to the instructions and recommendations that come with your cycler If you don t own a battery cycler perhaps you can have a friend cycle your pack and note the capacity for you Balance the Propellers Carefully balance your propeller and spare propellers before you fly An unbalanced prop can be the single most significant cause of vibration that can damage your model Not only will engine mounting screws and bolts loosen possibly with disastrous effect but vibration may also damage your radio receiver and battery Vibration can also cause your fuel to foam which will in turn cause your engine to run hot or quit We use a Top Flite Precision Magnetic Prop Balancer TOPQ5700 in the workshop and keep a Great Planes Fingertip Prop Balancer GPMQ5000 in our flight box Ground Check If the engine is new follow the engine manufacturer s instructions to break in the engine After break in confirm that the engine idles reliably transitions smoothly and rapidly to full power and maintains full power indefinitely After you run the engine on the model inspect the model closely to make sure all screws remained tight the hinges are secure the prop is secure and all pushrods and connectors are secure Range Check Ground check the operational range of your radio before the first flight of the day With the transmitter antenna collapsed
55. off the paper backing and submerse the decal in the soap and water 3 Position decal on the model where desired Holding the decal down use a paper towel to wipe most of the water away 4 Use a piece of soft balsa or something similar to squeegee remaining water from under the decal Apply the rest of the decals the same way GET THE MODEL READY TO FLY Check the Control Directions d 1 Center the trims on the transmitter then turn on the transmitter and receiver If necessary remove the servo arms from the servos and reposition them so they are centered Be sure to install the screws that hold on the servo arms J 2 With the transmitter and receiver still on check all the control surfaces to see if they are centered If necessary adjust the clevises on the pushrods to center the control surfaces 4 CHANNEL RADIO SET UP STANDARD MODE 2 ELEVATOR MOVES UP RIGHT AILERON MOVES UP LEFT AILERON MOVES DOWN RUDDER MOVES RIGHT CARBURETOR WIDE OPEN A 51 3 Make certain that the control surfaces and the carburetor respond in the correct direction as shown in the diagram If any of the controls respond in the wrong direction 36 use the servo reversing in the transmitter to reverse the servos connected to those controls Be certain the control surfaces have remained centered Adjust if necessary Set the Control Throws Use a Great Planes AccuThrow or a ru
56. on with all of the systems in place including the engine landing gear covering and paint and the radio system lA 3 1 4 82 mm c a d 1 If using a Great Planes C G Machine set the rulers to 3 1 4 82mm If not using a C G Machine use a felt tip pen or 1 8 wide 8mm tape to accurately mark an approximately 7 200mm line on the top of the wing 3 1 4 82mm back from the leading edge This is where your model should balance for the first flights Later you may wish to experiment by shifting the C G up to 1 4 6mm forward or 1 4 6mm back to change the flying characteristics Moving the C G forward may improve the smoothness and stability but the model may then require more speed for takeoff and make it more difficult to slow for landing Moving the C G aft makes the model more maneuverable but could also cause it to become difficult to control In any case start at the recommended balance point and do not at any time balance the model outside the specified range 3 1 4 82mm Le gt J 2 Bolt the wing to the fuselage With all parts of the model installed ready to fly and an empty fuel tank place the model upside down on the Great Planes CG Machine or lift it upside down with one finger from each hand on the line you marked on the balance point J 3 If the tail drops the model is tail heavy and weight must be added to the nose to balance If th
57. pit then paint per your taste Acrylic paints found at craft and hobby stores are recommended because they are easy to use and clean up with water 35 5 I 3 If the cockpit was covered with iron on covering cut away the covering so the pilot can be glued to bare wood This is not necessary if the cockpit was painted Glue the pilot into position with medium CA or epoxy 1 4 Cut out the instrument panel decal and stick it into position on former FD3 1 5 Cut out the canopy along the molded in cutlines True the edges with a bar sander then wash in soapy water Rinse thoroughly and dry LJ 6 Place the canopy on the fuselage Drill four 1 16 1 6mm holes through both sides of the canopy and into the fuselage Enlarge the holes in the canopy only with a 3 32 2 4mm drill J 7 Apply 1 4 6mm striping tape around the perimeter of the canopy Screw the canopy to the fuselage with eight 2 x 3 16 4 8mm screws Apply the Decals 1 Use scissors or a sharp hobby knife to cut the decals from the sheet The best way to apply sticky back decals is to use the soap and water method This allows easy accurate positioning and eliminates air bubbles underneath 2 Be certain the model is clean and free from oily fingerprints and dust Prepare a dishpan or small bucket with a mixture of liquid dish soap and warm water about one teaspoon of soap per gallon of water Peel
58. pproximately 400 feet within 3 miles of an airport without notifying the airport operator will give right of way to and avoid flying in the proximity of full scale aircraft Where necessary an observer shall be used to supervise flying to avoid having models fly in the proximity of full scale aircraft 3 Where established will abide by the safety rules for the flying site use and will not willfully and deliberately fly my models in a careless reckless and or dangerous manner 7 will not fly my model unless it is identified with my name and address or AMA number on or in the model 9 will not operate models with pyrotechnics any device that explodes burns or propels a projectile of any kind RADIO CONTROL 1 will have completed a successful radio equipment ground check before the first flight of a new or repaired model 2 will not fly my model aircraft in the presence of spectators until become a qualified flier unless assisted by an experienced helper 3 will perform my initial turn after takeoff away from the pit or spectator areas and will not thereafter fly over pit or spectator areas unless beyond my control 4 will operate my model using only radio control frequencies currently allowed by the Federal Communications Commission CHECK LIST During the last few moments of preparation your mind may be elsewhere anticipating the excitement of the first flight Because of this you may be mo
59. re likely to overlook certain checks and procedures that should be performed before the model is flown To help avoid this a check list is provided to make sure these important areas are not overlooked Many are covered in the instruction manual so where appropriate refer to the manual for complete instructions Be sure to check the items off as they are completed that s why it s called a check listh Fuelproof all areas exposed to fuel or exhaust residue such as the firewall and the rest of the engine compartment and the wing saddle area Check the C G according to the measurements provided in the manual Be certain the battery and receiver are securely mounted in the fuse Simply stuffing them into place with foam rubber is not sufficient Don t forget to extend the receiver antenna and make sure it has a strain relief inside the fuselage to keep tension off the solder joint inside the receiver Balance the model laterally as explained in the instructions Use thread locking compound to secure critical fasteners such as the set screws in the wheel collars and the screw in the screw lock pushrod connector Add a drop of oil to the axles so the wheels will turn freely Make sure all hinges are securely glued in place 9 Reinforce holes for wood screws with thin CA where appropriate servo mounting screws landing gear strap screws etc Confirm that all controls operate in the correct direction and that the
60. rol Surfaces b 1 1 If you haven t already done so cut a small strip of covering from all the hinge slots Also cut the covering from the grooves in the elevators and ailerons for the joiner wires and torque rods 2 Test fit the ailerons to the wing with the hinges If any of the hinges don t remain centered stick a T pin through the middle of them to hold them in place 31 J 3 Apply 30 minute epoxy in the groove and in the hole in one of the ailerons for the torque rod Also apply epoxy to the aileron torque rod for the aileron you are installing Join the aileron to the wing and the torque rod Wipe away any epoxy that squeezes out J 4 Adjust the aileron so there is a small gap between it and the wing just enough to see light through or to slip a piece of paper through Apply six drops of thin CA to both sides of all four aileron hinges Wait a few seconds between drops to allow the previous drop of CA to soak in so it doesn t run down the hinge gap If you do get any CA in the hinge gap you can soak it up before it hardens with a tissue or a paper towel square If any CA in the hinge gap hardens most of it can be picked out with a 11 blade Any remaining hardened CA can be cleaned out with CA debonder LJ 5 Hinge the elevators and rudder the same way Don t forget to install the tail gear before gluing in the hinges Glue the tail gear bearing into the fuselage
61. s Dead Center engine mount hole locator or a wire sharpened on the end to mark the engine mounting holes on the mount J 13 Remove the engine and mount from the fuselage Drill 3 32 2 4mm holes through the engine mount at the marks you made Re mount the engine mount to the firewall then mount the engine to the mount with four 4 x 3 4 19mm screws and 4 flat washers and lock washers Center the engine mount from side to side on the centerline drawn down the firewall then tighten the screws Hint Some modelers prefer machine thread screws rather than sheet metal screws for mounting their engines If this is your preference drill 43 2 2mm holes and use a 4 40 tap to cut threads into the holes Mount the engine with four 4 40 x 1 25mm screws not included 4 lock washers and flat washers 14 If using the O S MAX 40 or 46 FX engine the hole in the firewall and formers for the throttle pushrod guide tube are already in the correct location If using a different engine 24 the hole in the firewall for the guide tube might have to be relocated to align with the carburetor arm on the engine If necessary determine where a new hole is to be drilled then drill a 3 16 4 8mm hole J 15 Cut one of the leftover gray pushrod guide tubes to the length shown on the plan to be used for the throttle guide tube Roughen the outside of the tube with coarse sandpaper then install and glue the tube into position
62. the ends of the sheeting even with the formers Add balsa filler if necessary allow to dry then sand smooth Build the Rear Turtledeck 7 1 Glue the stab saddle SS into position J 2 Glue together both die cut 1 16 1 6mm balsa turtledeck formers TD3 Note that the formers are flip flopped thus forming 1 8 3 2mm notches for the stringers 1 3 Glue turtledeck formers TD1 TD2 and TD3 into position Use one of the die cut 1 16 1 6mm balsa turtledeck gauges TDG to set TD1 at the correct angle LJ 4 Use the remaining six 1 8 x 1 4 x 36 3 2 x 6 4 x 910mm balsa sticks for the aft turtledeck stringers and glue them into position J 5 Bolt the wing to the fuselage Place a weight on top of the stab to hold it down Stand approximately ten feet behind the model and view the alignment between the stab and wing If necessary shift the weight slightly to align the stab 26 with the wing If shifting the weight doesn t do the trick remove the stab and carefully sand the stab saddle to get the stab in alignment with the wing waver 7 BALSA the stab plan Transfer the centerline on the stab plan onto the top of the stab J 7 Taking accurate measurements mark the centerline of the fuselage on the top of F6 8 Place the stab on the fuselage aligning the lines Hold the front of the stab to the fuse with T pin
63. the other ribs and the top and bottom of the trailing edge HOBBY HOLD KNIFE AT AN ANGLE WHEN CUTTING o Q LEADING io LJ 18 Use a hobby knife to separate the 30 760mm shaped leading edges from each other as shown in the sketch 17 19 Glue one of the leading edges into position Be certain the leading edge is centered vertically on all the ribs and the dowel plate Note that the tip of the leading edge should extend approximately 1 1 2 388mm beyond R3 at the wing tip VERTICAL GRAIN SHEAR WEBS 51 LJ 20 Cut four 1 9 16 39mm vertical grain shear webs from the 3 32 x 3 x 24 2 4 x 76 x 609mm hard balsa sheet Trim the ends of the shear webs to fit between the ribs where shown on the plan The same as when gluing the die cut shear webs into position use a piece of leftover 3 32 2 4mm balsa to raise the shear webs from the plan Note Remove any T pins that are in the way 1 UU 21 Remove any T pins that are in the bottom spar between R1 and the last R2 Sheet the top of the wing with a 3 32 x 3 x 36 2 4 x 76 x 914mm balsa sheet J LJ 22 Now the wing may be removed from the building board Use part of another 3 32 x 3 x 36 2 4 x 76 x 914mm balsa sheet to sheet the bottom of the wing but only between the trailing edge and the main spar 14 J J 23 Drill a 20 or 5 32 4mm hole through the landing gear rail and the landing gear block 11 16 18m
64. the shape of the ribs 15 LJ 31 Using the partially cut guide lines on R1 cut the rest of the way through and remove the section of balsa between the spars 1 LJ 32 Test fit then glue together all the die cut 3 32 2 4mm balsa parts of the wing tip Be certain to make a right or a left tip depending on which wing panel is currently under construction J J 33 Glue the completed wing tip assembly to the end of the wing Round the leading edge as shown in the photo and on the plan Add the tip bracing from leftover 1 4 6 4mm balsa J LJ 34 Cut a 1 2 13mm strip from the top sheeting over the opening for the aileron servo J 35 Return to step 4 and build the right wing panel Be sure to place the right panel wing plan over your building board so as not to accidentally build another left panel Make the Ailerons Again do the left wing first 1 LJ 1 Mark one of the basswood shaped wing trailing edges where the left aileron torque rod will go through PLASTIC BEARING TUBE J LJ 2 Use a rotary tool or a hobby knife to cut a groove to accommodate the left aileron torque rod 16 1 J 3 Cut a matching groove in the wing trailing edge J J 4 Roughen the plastic bearing tube on the torque rod with coarse sandpaper Use thick or medium CA to glue the tube into the shaped trailing edge Use caution not to inadvertently get any glue inside the
65. throws are set up according to the manual J 11 Make sure there are silicone retainers on all the clevises and that the screws that hold the servo arms to the servos are installed J 12 Make sure the fuel lines are connected and are not kinked J 13 Balance your propeller and spare propellers I 14 Tighten the propeller nut and spinner J 15 Place your name address AMA number and telephone number on or inside your model J 16 The condition of a battery pack can be determined by cycling it and comparing the actual capacity to the rated capacity on the label Cycle the receiver battery pack if necessary and make sure it is fully charged 17 If you wish to photograph your model do so before the first flight 18 Range check the radio when you get to the flying field L L FLYING The Rapture 40 is a great flying model that flies smoothly and predictably The Rapture does not however possess the self recovery characteristics of a primary R C trainer and should be flown only by experienced R C pilots or by intermediate pilots with the assistance of an experienced pilot CAUTION THIS APPLIES TO ALL R C AIRPLANES If while flying you notice an alarming or unusual sound such as a low pitched buzz this may indicate control surface flutter Flutter occurs when a control surface such as an aileron or elevator or a flying surface such as a wing or stab rapidly vibrates up and
66. ubber band and a sheet of 1 4 6 4mm R C foam rubber in between E t is TT 1 7 Temporarily mount the tank tray in the fuselage with the tank tray retainer and two 2 x 1 2 13mm screws Note that the tab on the front of the tank tray keys into the notch in the back of the firewall J 8 Cut the spreader bar from both engine mount halves LJ 9 Temporarily mount the engine mount to the firewall with four 6 32 x 1 25mm socket head cap screws and 6 lock washers and 6 flat washers S 4 J 10 Drill 15 64 6mm or 1 4 6 4mm holes through the firewall for the fuel lines Hint If the engine mount is in the way draw the outline of the inside of the engine mount on the firewall Remove the mount then drill the holes J 11 Use epoxy to glue the cheek supports CS to the inside of both fuselage sides in front of the firewall With the engine resting on the engine mount test fit then glue the cheek floor into position as you squeeze the fuselage sides to it Make certain the cheek floor doesn t interfere with the engine 1 12 Mount a 2 1 2 64mm spinner not included and propeller to the engine Place the engine on the mount Adjust the spacing of the mount halves to fit the engine then temporarily tighten the screws Position the engine on the mount so there will be an approximately 1 8 3mm space between the spinner and fuselage sides Use a Great Plane
67. ully contacting the fuselage top Also note that the right side of the firewall should be all the way back in the notch in the fuselage side and the left side of the firewall should be all the way forward in the notch in the fuselage side J 16 After the epoxy from the previous step has hardened remove the clamps Test fit then glue the forward fuselage bottom into position Also glue the fuselage sides to the fuselage top forward of F2 J 17 The fuselage may now be removed from the building board Use a bar sander with 80 grit sandpaper to sand the fuselage sides and top and bottom flat and even Mount the Wing J 1 If the wing hasn t yet been final sanded go ahead and at least sand the area around the dowel holes The rest of the wing can be final sanded later but it will be easier to sand around the dowel holes before the dowels have been installed J 2 Cut two 1 1 8 29mm wing dowels from the 1 4 x 6 6 4 x 150mm hardwood dowel Round one end of the wing dowels J 3 Use 30 minute epoxy to glue the dowels into the front of the wing with the rounded ends out Be certain approximately 3 8 10mm of the dowels protrude from the leading edge Le gt s o 5 J 4 After the epoxy has hardened place the wing on the fuselage Stick a T pin into the center of the rear of the bottom of the fuselage Tie a loop in one end of a 40 1m piece of non elastic string such as monofilament or Kevlar
68. wel plates This is the end that goes on R1 Q LJ 12 Fit but do not glue rib R1 into position Place a leftover piece of 3 32 2 4mm balsa on the plan against the bottom spar 1 LJ 13 Fit but do not glue the die cut 3 32 2 4mm balsa shear web DG between R1 and R2 Make sure the shear web is installed with the angled end contacting R1 so that the top of R1 is slanting outward toward the wing tip Glue R1 to the top and bottom spars only J 14 Remove the shear web Flip it over then use it to check the angle of R1 as you glue it to the forward and aft dowel plates LJ LJ 15 Using the 3 32 2 4mm balsa shim to raise the shear web from the plan glue the shear web to the back of the spars Use the same procedure to glue another shear web to the front of the spars Be careful not to inadvertently glue the leftover balsa shim to the spars or shear web 1 LJ 16 Lightly sand the front of the dowel plates to trim any ribs that may be protruding 13 Refer to this photo for the following three steps i oat om ome ERE Deme R3 J LJ 17 Glue the 3 8 x 3 4 x 30 2 4 x 19 x 760mm balsa wing trailing edge into position Note that the trailing edge should be centered vertically on all the ribs This means that the top and bottom of all the R3 ribs will be even with the top and bottom of the trailing edge but there will be a 3 32 2 4mm difference between the top and bottom of
69. with epoxy but don t inadvertently glue the bearing to the rudder LJ 6 Mount a 1 25mm tail wheel not included to the tail gear with a 3 32 2 4mm wheel collar and a set screw Before installing the screw apply a drop of threadlocker to the threads Hook up the Controls EXIT SLOT J 1 Cut the covering from both sides of the fuselage over the pushrod exit slots in the guide tubes J 2 Thread a nylon clevis twenty full turns onto the threaded end of a 36 910mm wire pushrod Slip a silicone retainer over the clevis then connect the clevis to the outer hole in a control horn Make another assembly the same way HINGE LINE CORRECT INCORRECT J 3 Cut both pushrods to a length of 26 660mm Guide the pushrods up through the tubes in the fuselage Position the rudder control horn on the rudder as shown Note that the clevis holes in the horn should be positioned over the pivot point leading edge of the rudder Use a ballpoint pen or a piece of leftover pushrod to mark the location of the two mounting holes in the horn on the rudder J 4 Drill 3 32 2 4mm holes at the marks Mount the horn to the rudder with two 2 x 1 2 13mm screws and the nylon mounting plate 32 5 Mount the elevator control horn to the elevator the same way Note that the horn must be as close to the edge of the elevator as possible so the screw does not interfere with the joiner wire J
70. y to align the tip of the fin and rudder by sanding them to match each other 7 6 Using the centerline as a guide refer to the plan to get the correct angle then shape the leading edge of the rudder to a V The best tool for this is the Master Airscrew razor plane MASR1510 If you don t have a razor plane a bar sander with 80 grit sandpaper can be used instead The V doesn t have to be sharp but make certain you can get 1 25mm of both right and left rudder throw J 7 Set the fin and rudder aside Mark the centerlines and hinge locations and cut the hinge slots on both elevators and the stab the same way but don t cut the V until instructed to do so LJ 8 With the elevators temporarily connected to the stabilizer with the hinges determine which side looks best Write bottom on the other side of the center of the stab 1 9 Place the joiner wire on the bottom of the stab as shown Use a ballpoint pen to mark the location of the ends of the joiner wire where it will go into the elevators d 10 Extend the lines across the bottom of the elevator using a small square J 11 Drill a 9 64 3 6mm or 1 8 3 2mm hole 1 25mm deep into both the elevators centered on the lines 10 Lia Ue Koes HOW TO SHARPEN A BRASS TUBE FOR CUTTING BALSA Often using a brass tube sharpened on the end to cut holes or grooves
71. you should rely upon your experience to decide what type of glue to use When a specific type of adhesive works best for that step the instructions will make a recommendation e Whenever just epoxy is specified you may use either 30 minute or 45 minute epoxy or 6 minute epoxy When 30 minute epoxy is specified it is highly recommended that you use only 30 minute or 45 minute epoxy because you will need the working time and or the additional strength e Photos and sketches are placed before the step they refer to Frequently you can study photos in following steps to get another view of the same parts e Not all die cut parts have a name or their complete name stamped on them so refer to the Die Cut Patterns on page 6 for identification When it s time to remove the parts from their die sheets if they are difficult to remove do not force them out Instead use a sharp 11 blade to carefully cut the part from the sheet then lightly sand the edges to remove any slivers or irregularities Save some of the larger scraps of wood TYPES OF WOOD means that you should first position the part on the peed HE assembly without using any glue then slightly modify or Balsa Basswood Plywood custom fit the part as necessary for the best fit METRIC CONVERSIONS 1 64 4 mm 3 8 9 5 mm 12 304 8 mm 1 32 8 mm 1 2 12 7 16 457 2 1 16 1 6 mm 5 8 15 9 21 533 4 3 32 2 4mm 3 4
Download Pdf Manuals

Related Search
GREATPLANES Rapture 40 Manual great planes pt 40 manual